
There are many ways to teach history.
However, I like teaching American History and World History in a timeline manner.
This will help my student organize facts and events in sequence.
Also, we love incorporating, interactive notebooks, journals, lap books and of course reading.
Using a variety of resources your students are able to repeat information
over and over again until memorization.

Download Lap Book Now
So we have made it to WWII and because this is such an extensive
unit we are starting with some biographical lap books first.
This will help my student recognize some names and people.
We start with Adolf Hilter and I have names my Unit
Adolf Hitler "The Face of Evil"
This is a biographical lap book which has an informational text
that can be kept inside the file folders.
What will you need to complete this lap book?
You will need two file folders and 1 card stock insert.
Glue and scissors.
What is inside this Biographical Lap Book?
Each mini book will have your kids writing information provided
in their informational text.
Please read on to understand each section
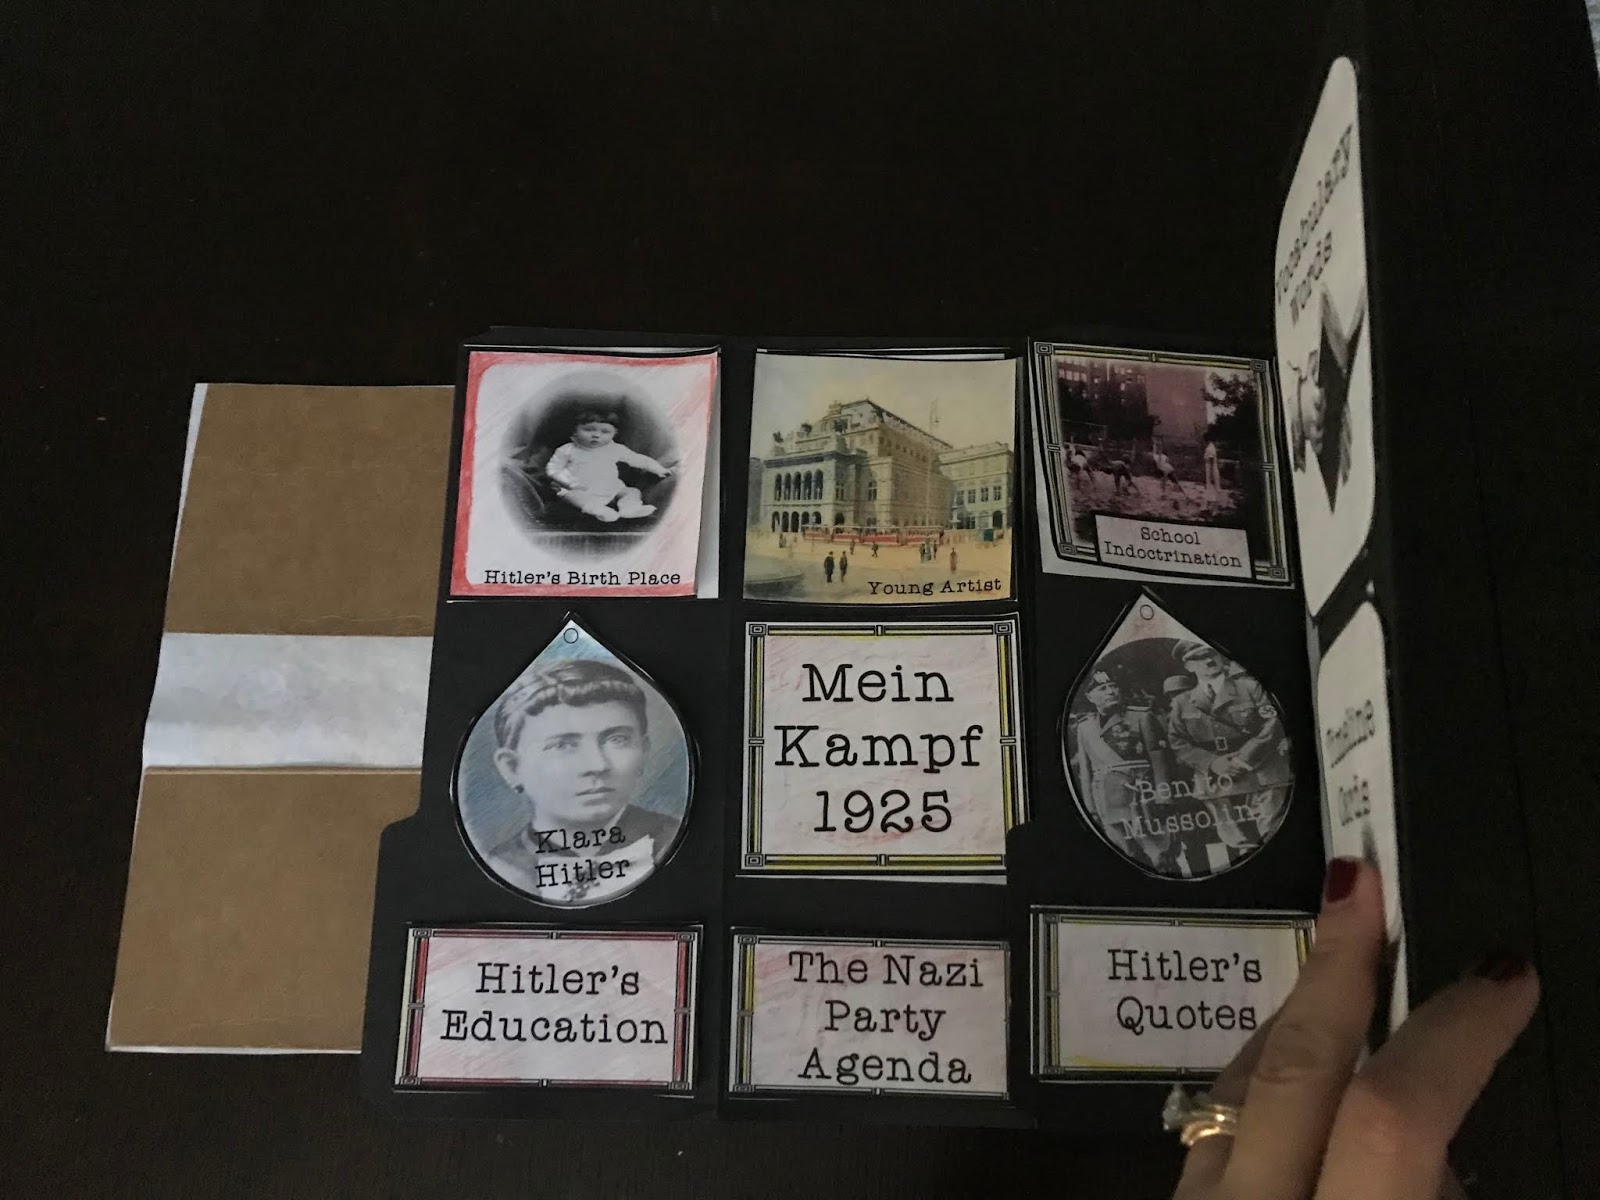
Hitler's Brith Place
Klara Hitler
Hitler's Education
A Young Artist
Mein Kampf
The Nazi Party Agenda
Germany After WWI
Hitler WWI
Becoming Chancellor
Eva Braun
Eva's Home Movies
Newspaper insert of Hitler's Death
School Indoctrination
Benito Mussolini
Hitler's Quotes
Vocabulary words
Timeline Cards
1936 Olympics
Historical Archives ( a series of photos from WWII)
Hitter's Family Tree
Europe
Military Campaigns
Operation Barbossa
Map of Europe
Nazi Occupied Countries
Jesse Owens
Pictures of Our Completed Project

We have used black file folders for WWII

Each pocket and flip book will hold more information.
There is also room for more information you want to add.
In case you pair this unit with any other movies or books your
students can further personalize each section of this lap book.

The informational text can also be cut and used as an interactive notebook.
You may also leave it the way it is and insert into a pocket you will
create by gluing both file folders together.
We have used card-stock from a cereal box to reinforce the back side
of our title page. You can avoid this by printing in card-stock.
How to put this lap book together


Each part of the lap book is explained in detail with simulated
lap books and with photos of the completed project.
You may also watch our video to take a tour inside this amazing project.
No comments:
Post a Comment